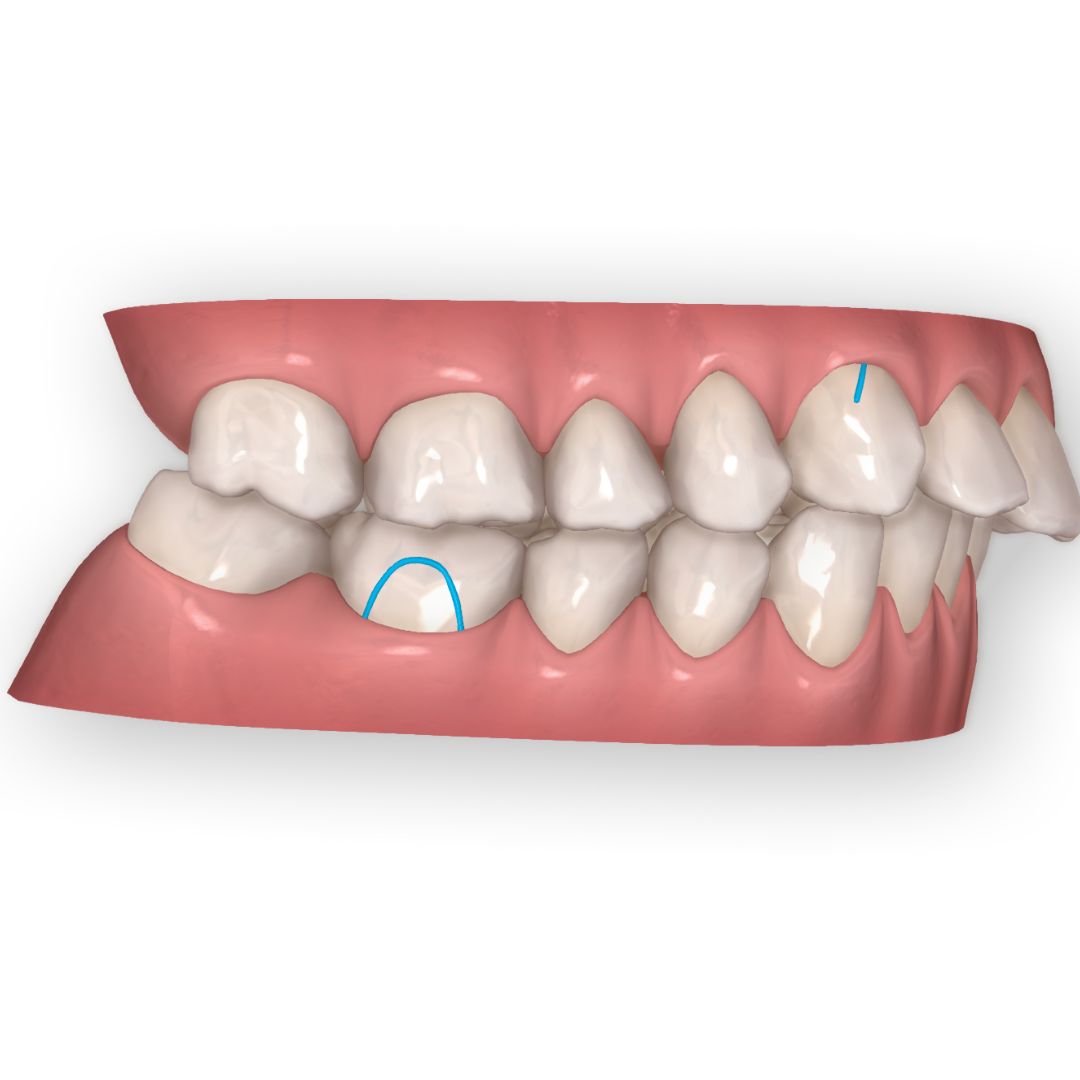
The virtual mesial jump with clear aligners: a predictable approach
The virtual mesial jump is one of those movements that tends to produce inconsistent results when approached without a clear protocol. When a jump fails to express, the instinct is often to question the aligner system. In most cases, the real issue is what happened (or didn’t happen) before the movement was programmed.
Predictability in this movement depends on preparation, not on luck or software defaults.
The environment comes before the movement
Before staging the jump itself, root movements of all incisors (upper and lower) need to be addressed separately. When the software is simultaneously managing root displacement and mesial translation, mechanical efficiency drops. The system ends up working against itself.
The principle here is simple: resolve the root environment first, then program the jump.
Digital space that doesn’t show in the mouth: why it matters
One of the counterintuitive aspects of planning a mesial jump is that the final digital position should include space mesial to the canine, even if that space will not appear clinically.
This margin in the plan is not cosmetic. It creates the biomechanical room the tooth needs to move. Without it, the system has no viable pathway and the jump either stalls or expresses incompletely.
Control where retention is absent
Every tooth in the arch without an attachment needs a root control optimizer. Where there is no attachment, the aligner loses three-dimensional control. Without that compensation, the jump movement can generate unwanted tipping throughout the arch (not just in the target area).
This is a detail that is easy to overlook in planning and expensive to correct afterward.
Posterior anchorage for cases with elastics
When molars are going to carry elastics, the configuration matters. The elastic should be positioned mesially, with a multiplanar optimized attachment distally (or a vertical attachment if no multiplanar option is available).
Without proper posterior anchorage, elastic forces can interfere with anterior mechanics. The distal attachment acts as a counterbalance, keeping the posterior segment stable while the jump occurs.
Magnitude: the variable that depends most on the patient
Movement magnitude is where most planning errors occur, typically through overcorrection.
The appropriate range varies by patient profile: conservative in adults with limited expansion capacity, moderate when stripping or greater expansion potential is available, and broader in adolescent patients whose biology supports more movement.
Exceeding what the patient’s system can express does not accelerate treatment. It produces a movement the aligner cannot deliver, leading to misfit and avoidable refinement sequences.
A protocol, not a setting
Cases where the virtual mesial jump fails can almost always be traced back to a gap in the preparation: uncontrolled root positions, missing digital space, absent optimizers, incomplete molar configuration, or miscalibrated magnitude.
When the protocol is applied in the right sequence, the movement expresses and treatment advances without corrections that should never have been necessary.
At Smart Aligners Services, this type of sequential biomechanical planning is at the core of the SAS Method. If you want to learn how to structure movements like the mesial jump with consistent, predictable results, discover how the SAS Method can help you approach these cases with greater control.
Attachments in clear aligners: what they do and which types matter
Using a Bolton discrepancy to simplify extraction cases
Clear aligner training for orthodontists: what actually moves the needle